 Grok Swift
May 19, 2015
Scrolling to a certain point in a table view is a common requirement. For example, you might scroll to show new entries after loading new data or to show that a row has updated data. Since UITableView inherits from UIScrollView it’s easy to scroll programmatically.
In this demo we’ll set up a few different scrolling actions. To select where we want to scroll to we’ll use an Action Sheet, implementing as a UIAlertController with the .ActionSheet style. It’ll have a UIAlertAction for each of the scroll options.
This tutorial has been updated for Swift 2.0 and Xcode 7.
Project Set Up
To start we need a tableview to scroll. So create a new project that has a tableview that lists the integers from 0 to 100:
import UIKit

class ScrollDemoViewController: UITableViewController {
  var objects = [AnyObject]()

  override func awakeFromNib() {
    super.awakeFromNib()
  }

  override func viewDidLoad() {
    super.viewDidLoad()

    for number in 1...100 {
      self.objects.append(String(number))
    }
  }

  // MARK: - Table View
  override func tableView(tableView: UITableView, numberOfRowsInSection section: Int) -> Int {
    return objects.count
  }

  override func tableView(tableView: UITableView, cellForRowAtIndexPath indexPath: NSIndexPath) -> UITableViewCell {
    let cell = tableView.dequeueReusableCellWithIdentifier("Cell", forIndexPath: indexPath)

    if let object = objects[indexPath.row] as? String {
      cell.textLabel!.text = object
    }
    else {
      cell.textLabel!.text = nil
    }

    return cell
  }
}
To display the action sheet they’ll tap on a button in the nav bar:
override func viewDidLoad() {
  super.viewDidLoad()
  let scrollOptionsButton = UIBarButtonItem(barButtonSystemItem: .Action, target: self, action: "showScrollOptions")
  self.navigationItem.rightBarButtonItem = scrollOptionsButton

  for number in 1...100 {
    self.objects.append(String(number))
  }
}

func showScrollOptions() {
  // TODO: impleement
}
Displaying an Action Sheet in iOS8
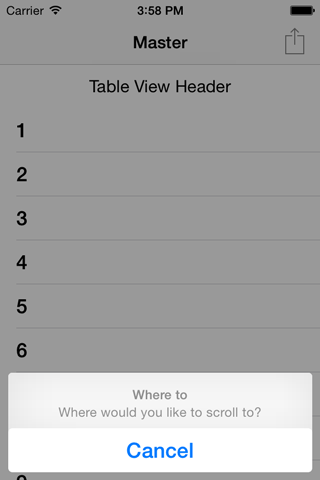
Now we need our Action Sheet so they can pick how they want to scroll. We’ll start with just a Cancel button:
func showScrollOptions() {
  let sheet = UIAlertController(title: "Where to", message: "Where would you like to scroll to?", preferredStyle: .ActionSheet)

  let cancelAction = UIAlertAction(title: "Cancel", style: UIAlertActionStyle.Cancel, handler:{ (alert: UIAlertAction) in
      self.dismissViewControllerAnimated(true, completion: nil)
  });
  sheet.addAction(cancelAction)

  self.presentViewController(sheet, animated: true, completion: nil)
}
In iOS8 we no longer use UIActionSheets since it’s been deprecated. To get the same appearance we use a UIAlertController with preferredStyle: .ActionSheet. The initializer doesn’t take a list of actions. Once we’ve created our UIAlertController we can create and add UIAlertActions. Which is how we’ve added our Cancel action.
UIAlertActions take a few properties: the title and style for display and a handler block to be executed when the action is selected. In our cancel action handler block we just dismiss the action sheet.
Once we’ve added our action we can use presentViewController to display the action sheet:
Scroll to First Row
The first scrolling action we’ll add to our action sheet is scrolling the first row in the tableview. Note that this action is different than scrolling to the top of the tableview. If the tableview has a header then scrolling to the top would scroll to the top of the header. We’ll do that action later.
First we add a new action to the sheet (after the cancel action but before calling presentViewController):
// Scroll to Top
let firstRowAction = UIAlertAction(title: "First Row", style: UIAlertActionStyle.Default, handler:{ (alert: UIAlertAction) in
  self.scrollToFirstRow()
  self.dismissViewControllerAnimated(true, completion: nil)
});
sheet.addAction(firstRowAction)
Then we need the actual scrolling code. UITableView has a great convenience method for scrolling to rows: scrollToRowAtIndexPath
func scrollToFirstRow() {
  let indexPath = NSIndexPath(forRow: 0, inSection: 0)
  self.tableView.scrollToRowAtIndexPath(indexPath, atScrollPosition: .Top, animated: true)
}
scrollToRowAtIndexPath takes an NSIndexPath which is a way of giving a location in a set of nested arrays (i.e., arrays of arrays). The data in a tableview is an array of arrays: sections (often only one) of rows. So we can use an index path to describe the location of a row in a tableview. There’s even a nice convenient method that creates an index path based on the section and row:
let indexPath = NSIndexPath(forRow: 0, inSection: 0)
The indexes start at 0, we have only 1 section, and we want the first row so our index path is 0.0.
To actually scroll we pass the index path to scrollToRowAtIndexPath:
self.tableView.scrollToRowAtIndexPath(indexPath, atScrollPosition: .Top, animated: true)
There are 2 options (in addition to the index path):
atScrollPosition: lets us choose where the row should be displayed when we scroll. We can opt to scroll so that the row is at the top of the view, the bottom, or the middle. There’s also an option called None which scrolls as little as possible to display the row. So if you’re below the row it’ll scroll it to the bottom of the screen but if you’re above the row it’ll scroll it to the top. If it’s already visible it won’t scroll at all. Note that you can’t scroll beyond the edges of a table, for example, you can’t scroll the first row to the bottom or the last row to the top.
animated: lets us select whether the table should animate the transition to the row or just jump to it.
Scroll to Last Row
Scrolling to the last row is pretty similar to the first row, except we need to compute the index path. So add the action to the action sheet:
let lastRowAction = UIAlertAction(title: "Last Row", style: UIAlertActionStyle.Default, handler:{ (alert: UIAlertAction) in
  self.scrollToLastRow()
  self.dismissViewControllerAnimated(true, completion: nil)
});
sheet.addAction(lastRowAction)
Then compute the index path and scroll (this time with the row getting positioned at the bottom of the view):
func scrollToLastRow() {
  let indexPath = NSIndexPath(forRow: objects.count - 1, inSection: 0)
  self.tableView.scrollToRowAtIndexPath(indexPath, atScrollPosition: .Bottom, animated: true)
}
Scroll to Selected Row
We can also scroll to a currently selected row (make sure there isn’t a view transition / segue hooked up to use this):
func scrollToSelectedRow() {
  let selectedRows = self.tableView.indexPathsForSelectedRows
  if let selectedRow = selectedRows?[0] as? NSIndexPath {
    self.tableView.scrollToRowAtIndexPath(selectedRow, atScrollPosition: .Middle, animated: true)
  }
}
We need to make sure there’s at least one selected row and then get the index path for it before scrolling. If you want to get fancy you can display this option in the action sheet only if there’s a currently selected row:
let selectedRows = self.tableView.indexPathsForSelectedRows
if let selectedRow = selectedRows?[0] as? NSIndexPath {
  let selectedRowAction = UIAlertAction(title: "Selected Row", style: UIAlertActionStyle.Default, handler:{ (alert: UIAlertAction) in
    self.scrollToSelectedRow()
    self.dismissViewControllerAnimated(true, completion: nil)
  });
  sheet.addAction(selectedRowAction)
}
Personally, I’d leave the option always visible so users can discover that this functionality is available.
If you can compute the index path you can scroll to any row that you want to. For example, you might include a search function for your tableview that scrolls to the desired row.
Scroll to TableView Header
To scroll to the header we can’t use scrollToRowAtIndexPath. We have to fall back to the UIScrollView function scrollRectToVisible. First add that action sheet action (bet you’re getting good at that by now):
// Above Header
let topAction = UIAlertAction(title: "Header", style: UIAlertActionStyle.Default, handler:{ (alert: UIAlertAction) in
  self.scrollToHeader()
  self.dismissViewControllerAnimated(true, completion: nil)
});
sheet.addAction(topAction)
Then use the scroll view function to scroll to the top of the tableview:
func scrollToHeader() {
  self.tableView.scrollRectToVisible(CGRect(x: 0, y: 0, width: 1, height: 1), animated: true)
}
You can use that method to scroll to any point in the tableview by x, y value. It’ll also work with UIScrollViews and classes that inherit from it: UICollectionView and UITextView.
And That’s All
That’s all about programmatically scrolling UITableViews. If you’d like more Swift tutorials like this one, sign up below to get them sent directly to your inbox. Feel free to come back and visit too, were pretty friendly around here but we’ll understand if it’s just easier for us to come to you :)
P.S. If you got tired of typing, here’s the final code.